Wednesday, July 30, 2014

All The Little Things Add Up...

We spent the week finishing up little things here and there.  All the little things sure do add up to a good amount of work.

We left framing in the wall under the bed platform for last.  We knew we would have to build the wall complete with siding painted and all.  Due to the support steel beams, it had to be installed from inside.


Backside of the wall.


Front side with the siding installed.


We built it to be a very tight fit.  We had to knock it into place with a sledge hammer.


We bolted it in 3 places to the upper steel frame of the bed platform.


We bolted it the floor in 3 places as well.


We sealed in the gaps between the frame and the siding with Great Stuff.  After it hardened, we trimmed it flush and taped the Tyvek together over the foam.


It's fun to watch this stuff expand and grow.  :)


Trim came next.  We cut out around the beam so it was a solid
piece of trim. 


It's a bit hard to see but we used galvanized flashing under the siding to prevent water from splashing up and getting into the house from under the wall.  We pop riveted it down to the trailer on the outside. 


A better picture of the flashing before we riveted it
into place.


Now all we have to do to the exterior is build the door and finish the trim around it.  That will be a bit down the road since we still have to move in appliances and such.

On to the interior!  Bracing that is.  :)


We used all-thread to tie the walls down to the frame.  It goes from the top rail of the wall all the way through the bottom of the frame of the trailer.  We used locking nuts and a connector in the center to tighten it down tight.


We did this in all the corners and in the half way point of the walls.


This was an extra step we took to insure the walls would stay fastened and tight to the frame during hauling. 


That's the bottom of one of the pieces peeking through the trailer frame.  We trimmed them up a bit to keep them from getting caught on things. 


We plan to have some exposed brace beams in the house. Since our trailer is much longer than most tiny homes, we wanted something supporting the walls in the center of the trailer.
The beams across the rafters will be finished and painted to match the ceiling. 


The cross beam brace is 2 2x4's that we notched and glued together.  They run from the wall, just above where the kitchen counters start to the roof rafters.  They will be finished and painted to match the interior. 


And finally, we got the end caps up on the roof.  We couldn't find any manufactured end caps that went well with our roof.  The Hubby took a piece of flashing and bent a small one to the specs he wanted it to be.  We have a great local steel source we have used for all our trailer steel. 
http://www.jcsenterprises.net/default.htm

JCS Enterprises has been wonderful.  They were able to bend the end caps to our specs. And we love them!


End cap profile.


Front view.


Side view.

We are ready for the Arrango Insulation Co. to come out and spray the interior! YAY!

The electrical and plumbing will come later.  We plan to run both in pipe on the exterior of the wall.  That way we can easily access it if we need to fix anything or add circuits down the road. With the house being mobile, we worry that connections might loosen up or break.  Accessing either through a wood wall would be a pain in the you-know-what! 

So what do you all think so far?  Leave me some comments and thoughts on the job so far.  We would LOVE to hear from you! :)


Thursday, July 17, 2014

Problems, Delays and General Life Interuptions!

It's been awhile since we have worked on Tiny.  Close to a month now.  Life will find a way to interrupt when it can!

1st - Our 3 month old Dewalt table saw died on us. We went to work one day, plugged it in and went to turn it on and ....... nothing!  We took it apart and checked connections, looked for clogs and zip..nothing we tried worked.  My husband thinks it was either bad brushes on the motor or the motor itself.  So we called Lowes, where we bought it and luckily they have a 90 day return policy.  We had kept the original box and everything because we planned to sell it on Ebay after we completed Tiny.  We were a bit over but since we had all the original stuff, the manager was willing to take it back for us.  Bless you Lowes!  It wasn't a cheap saw!  So we got a new saw.  Went with a Porter Cable this time.  Plan to break it in this weekend.


2nd - The Hubby's sister bought a new house and it needed a bit of electrical work and various other minor things.  So, Hubby went to Virginia for a week to help her work on it and get it ready to move in.  She was extremely happy for the help and getting to spend some time with him.  We don't get to see her as much as we all would like.  They got her new home all squared away and it saved her a ton of money since she didn't have to hire someone to do the work.  Hubby was paid in lots of fresh coastal seafood.  Happy days for all!


3rd - My Dad was having some heart problems and trouble breathing.  His doctor ordered a Heart Cath to determine what needed to be done.  So we were off again, this time to North Carolina.  They found an 80% blockage in one of his arteries but good news is they got a stint in and it looks good.  The rest of his heart was in good shape the Doc said.  He stayed overnight and was home the next day.  It is amazing how they can do things so quickly and without major surgery now.  He was breathing better and everything after.

While we were there, the Hubby noticed how rotten their front porch was.  It was bad when they bought it, about a year ago and gotten worse.  It was done cheaply and not even attached to the house.  So while we were all at the hospital, he rebuilt the deck and stairs.  And it is now attached to the house with bolts.  It turned out amazing.  I wish I had taken "Before" pictures so you could see how bad it was.  I did take "After" pictures though!


Mom plans to make a decorative concrete walkway up to the porch with a poured pad in front.  It looks so much better now!  And the haze in the picture is from the humidity that morning.  It fogged my camera lens up a bit, that's how humid it was.  Nasty to work in. 


We are back home and ready to start work again on Tiny this weekend.  We have our new table saw and received word that our custom bent end caps for the roof are ready for pick up.  Hoping that weather permits us to get quite a bit done.  Here's hoping for good weather!  Keep your fingers crossed for us!  :)


Tuesday, June 17, 2014

Our Painted Lady!

We spent the weekend painting.   I've never really painted a house before.  And since Tiny really isn't all that big, I thought...how hard could it be??  Hmmm..little did I know right?  I have to say...I HATE painting!  I am glad it's done.  And that it turned out well.  I am very happy with the finished results. 

We chose a light blue grey for the main color and a darker grey for the trim.  I have always loved coastal houses painted in various shades of grey and blue.  Something about them inspires calm in me and reminds me of storm clouds, which I love.  Hard to imagine that storm clouds and calm go in the same sentence, right?  Storms have never bothered me.  I like to sit on my porch and watch them roll in. I love the scent of rain and the dark clouds.  

So, without further ado, here is our Painted Lady.  She is such a beauty in our eyes. :)


There is a bit of small work left to side and paint near the front door but that will be left until after we get the inside done and the appliances moved in.  That way the door trim and such won't be in the way.


Even though I hated painting, I am proud of how she turned out.  There is a certain satisfaction that comes with doing a job yourself.  It fills me with joy every time we finish another step in our build.  So yes, I may be sore as heck from the work but my heart is soaring.  I know I say it every post but I honestly can not wait til she is finished.  :)

Tuesday, June 10, 2014

Siding!! We have Siding!!

So, yeah..we got our siding up!!   Can you tell I am excited to have it done?  I was surprised how well it went up.  Spent all weekend getting it done.  No major hassles or issues..and it looks great! 


1st board in place!  I was so proud.  


1st row done!So far so good! 


Going up nice and easy so far.


Almost done with the right side!


Right side done!  Doesn't it look pretty! 


The backside half finished.  Realized I didn't get a finished picture!  Silly me.  


Left side finished.  We are loving this siding! 


Here she is with a layer of primer.  Now she's ready for paint! 


We went and got a few samples of colors to play with and to help narrow down our choices.  We are both more traditional when it comes to house colors.  I have always loved grey houses.  So the ones I tended to lean towards where all different shades of grey.  Worked out for me as the colors we liked best were grey!  The main body is a light grey with the trim being darker.  I think both colors work really well with the galvanized roof.  Reminds me of old houses in seaside towns.  Can't wait to see her all painted! 

Monday, May 26, 2014

All The Trimings and Everything!

We got our siding delivered and Ronnie spent the day laying it all out so he could prime the backside before we hang it.  There is a slight gap left for air movement when its hung so this just helps to ensure no water damages it and to help deter bugs from boring into it.


Back side all primed and ready to be hung.


This is pine lap siding also known as #105 pine siding. 


Windows being framed in.  We extended the trim all the way down to the bottom of the trailer to give it a clean look. 


We used our compact table saw to rip standard 2X4s into rough cut trim for the windows.  They came out really nice looking.  Better than the trim we found at the hardware store. 


We borrowed a compound miter saw from my brother in law.  It made such nice neat cuts.  We used it to cut the trim true on the ends and make all the cuts needed. 


I primed all the trim with a good exterior oil based primer we got at Sherman Williams. 


Back of the house trimmed and primed. 


We cut and hung the fascia boards also.  We used 1/2 inch plywood.  We cut a small rail for the underside and then covered the front to completely close it in.


Fascia boards primed and ready on the right side.


Fascia boards primed and ready on the left side. 


We used the scrap leftover strips from where Ronnie ripped the 2X4s down as furring strips. 


This helps leave a very thin gap between the siding and the outer wall for air flow. 


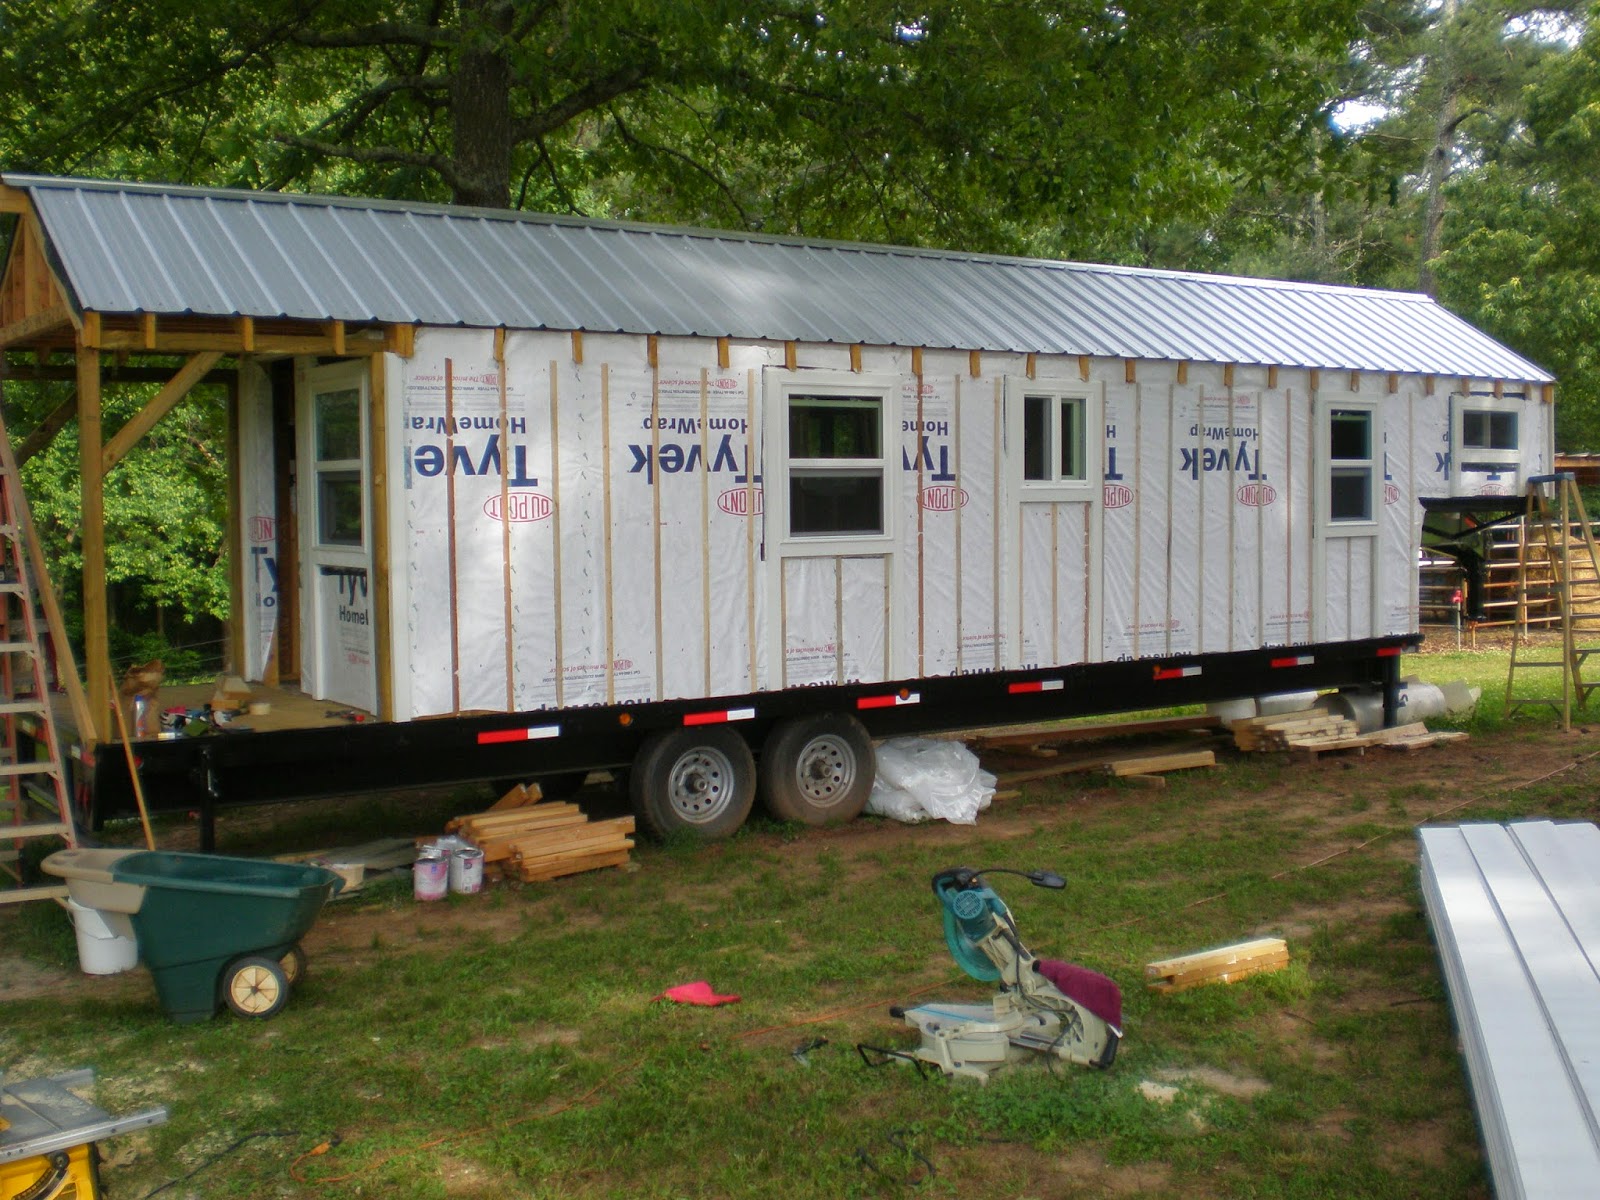
We were able to add the OSB to the front of the house, over the porch.  We put the house wrap up and have gotten most of the trim pieces ready but didn't have enough time to get them in place and primed.  Next step, finish that up and get ready to side!  :)

Thursday, May 8, 2014

What a View...Through Our Windows!

We spent the past weekend getting the windows in.  It wasn't back breaking work or anything either, which was nice.  The windows just seemed to pop right into place and not need a lot of adjustment to get them level.  We measured the windows really well so when we framed the spots in, they were almost perfect.  That saved us from having to trim out the holes more.  That old rule of thumb, "Measure twice, cut once"  really does pay off! 


Windows in the kitchen and bathroom, both sliders.


Windows in the bedroom area, bath, kitchen and living room. 


Windows in the living room, kitchen and bedroom area.   Opposite side of the trailer. 


Inside view looking towards the front door.  Please excuse the mess and temporary bracing still in place.  :)


 The light the windows let in was lovely and the breeze we got through there felt heavenly. 


 The bed platform windows are also sliders to get a nice cross breeze across the bed.


Lucky came to "help" out again.  He thinks he's the supervisor! 


Some of our neighbors came by to check out how the progress was going.  I think we have their approval so far. 


View out the living room window.


                View out the front window, overlooking the front porch where you can see Ronnie taking a break.


View out one of the kitchen windows. 


We are pleased with the progress so far and how things seem to be moving right along.  Now, we have to decide on the type of siding we want to use and get that going.  SIDING!!  YAY!!! :D

Thanks for staying with us on this journey!  We love having you along!