Wednesday, February 18, 2015

Bedroom Part 2. The Finishing Touches.

We spent Valentines weekend finishing up the bedroom area.  We got everything we wanted done and still had time to enjoy a nice meal out with friends. 


We left the bedroom slightly unfinished in the last post.  We had the cabinets built but not faced.  We also had to finish the baseboards on the bed area.  It was still pretty ugly looking. 


We bought some nice poplar boards to make the facing out of.  We got all the measurements and cut the boards.  We then used the Kreg Jig to drill the holes on the backside, so you wouldn't see them when assembled. 


Here it is mostly assembled.  We wanted to see if it would make the turn from the hallway into the bedroom.  Of course it wouldn't.  That means we'd have to assemble it in place.  Kind of a pain, since the screws are on the backside and the area was tight! 


We took it back apart to stain it.  We stained the baseboards also.  We used the same cabernet color stain we used on the rest of the bedroom.  The baseboards are made out of pine framing lumber, just like the bed frame. You can see the poplar is streaked with green in the grain.  This had a neat effect on the stain. 


The grain really pops out on this wood.  The green shows through in places, making me think of rhubarb stalks!  I loved how it turned out.


Here it is, installed and screwed down tight.  This side is for clothes. 


This side is our utility area.  This will house our water tank, pump  and the filter system.  We plan to build doors for both sides but that can be done at a later date.


Ronnie applying the polyurethane sealer over the stain.  


Baseboards in place! 


There it is...our bedroom.  We are really happy with how it turned out!  We do plan on making doors for the cabinets but that will come later.   We'll be sure to use more poplar for them, to get that rhubarb color to match!  I love how that wood took the stain!  

Now, on to the kitchen!  YAY!  :D


What Says "I Love You" Better Than an Appliance??

We all want that special someone to buy us something wonderful on Valentines Day.  It makes us feel special and loved, right?  Well, all I wanted for Valentines Day this year was my new fridge for the tiny house.  And guess what??  I got it!  :)


It's a Vissani 10.5 cubic ft, stands about about about 5 foot tall. 

Most of the tiny fridges you see have the old wire shelves inside, which I hate.  Things tend to tip and spill easy if not placed just right.  I wanted glass shelves.  Also, most fridges seemed to have the wire soda can holder in the door and the other door compartments are not adjustable.  We don't drink sodas so that was a waste of space to me.  And I want to be able to customize my door to hold what I want.  This fridge has adjustable pockets and the "can" spaces can be used for other things, like butter and such.  It has two crisper drawers and plenty of space. It also has an actual freezer, not one of those little slots to put frozen stuff.  You know the ones I mean....they always get frosted up real bad and never fit more than a few frozen dinners. 


I have been eying this little fridge every time we went to Home Depot.  Counting down the days when we'd be close enough to the kitchen build to actually buy it.  Finally, the time has come!  And what better gift on Valentines Day??  I mean, love radiates from the kitchen.  It's where you cook your family food that sustains them. And we have all been told that old saying..."The way to anyone's heart is through their stomach".  Your fridge holds most of those ingredients to make those wonderful meals.  :)  I can't wait to see it full of food!


Friday, February 13, 2015

Floor Finishing 101

We love our oak floor.  It was a pain to put down.  Heavy!  We waited to finish it until a majority of the work was done inside.  We didn't want to mess it up moving things around and stacking wood everywhere.  But the time has come to get it done.  We wanted it finished and sealed before we build our kitchen cabinets and moved the appliances in.  We bought a small belt sander from Harbor Freight and picked out our stain.  We went with a traditional color called Golden Pecan.  It looked great on the oak sample we saw.  So here's what we did and how it turned out!


As you can see, the floor got pretty dirty and a little stained with all the work we have been doing.  It was ready for some TLC!


We originally planned to leave the screws visible and fill them in with the floor sealer but decided it didn't look right. 
You can see the staining from moisture and dirt pretty well in this picture. 


Hubby built a homemade countersink stop for his drill.  We wanted the screws all countersunk at the same distance. 


Screws countersunk and in place.


We plugged the holes with a dowel rod.  We glued it in place.


We trimmed it flush with the floor.


We filed it smooth.  One down, now on to the hundred or so more screws we have to fill!


It's slow work but it's getting there!


Sanding the floors took some elbow grease.  Since a lot of the areas were tight, we used a small belt sander.  That meant the Hubby was crawling around on his knees to do the sanding.  It had to be done several times.  This is with a course grit sand paper to get a majority of the stains and dirt up. 


It had to be sanded again with a fine grit sandpaper to smooth it out completely before we could stain.  All that sanding covered everything in dust.  We used the air compressor to blow off the walls and such and then vacuumed several times to get all the dust up.  Did I mention it was DUSTY!?!


We wiped the floor completely with acetone to remove any lingering dust before we stained.  We applied the stain in small sections with a foam roller and let it sit a few minutes before wiping it off with a clean rag.  So far it looks great!


Stain completely rolled on and drying.  It turned out a little splotchy but we thought it would even out with the sealer.


We used Parks Pro Water based Polyurethane to seal the floors.  It looked like milk being spread on the floors.  As you can see, Hubby made his own protective booties out of plastic shopping bags to keep dirt off the floor.   


There it is...floor finished!  It didn't turn out as perfectly as we hoped.  It was still splotchy and unevenly stained in areas.  But it's done!  We are not beating ourselves up too badly since this was the first time we had done a staining job this big.  It shows character I think.  It shows we did it ourselves! And yes, I love my imperfect floor!


We have to be sure and put down protective covering when we lay anything on the floor now.  We bought some painters traps and packing blankets to use when we work inside. 


So, there you have it.  We now have finished floors and can move on to other things!  We will be finishing up the small details in the bedroom and then on to the kitchen!  Oh boy!  We are pretty excited to get to this stage!  I just love seeing my house come together bit by bit.  :)


Thursday, February 5, 2015

Bedroom Woodwork....CHECK!


We have been working on the bedroom area for a little while now.  Woodworking seems to take a lot more time.  Measure, measure again, cut, drill screw holes, sand and stain.  It takes a while to see the end results but well worth it!


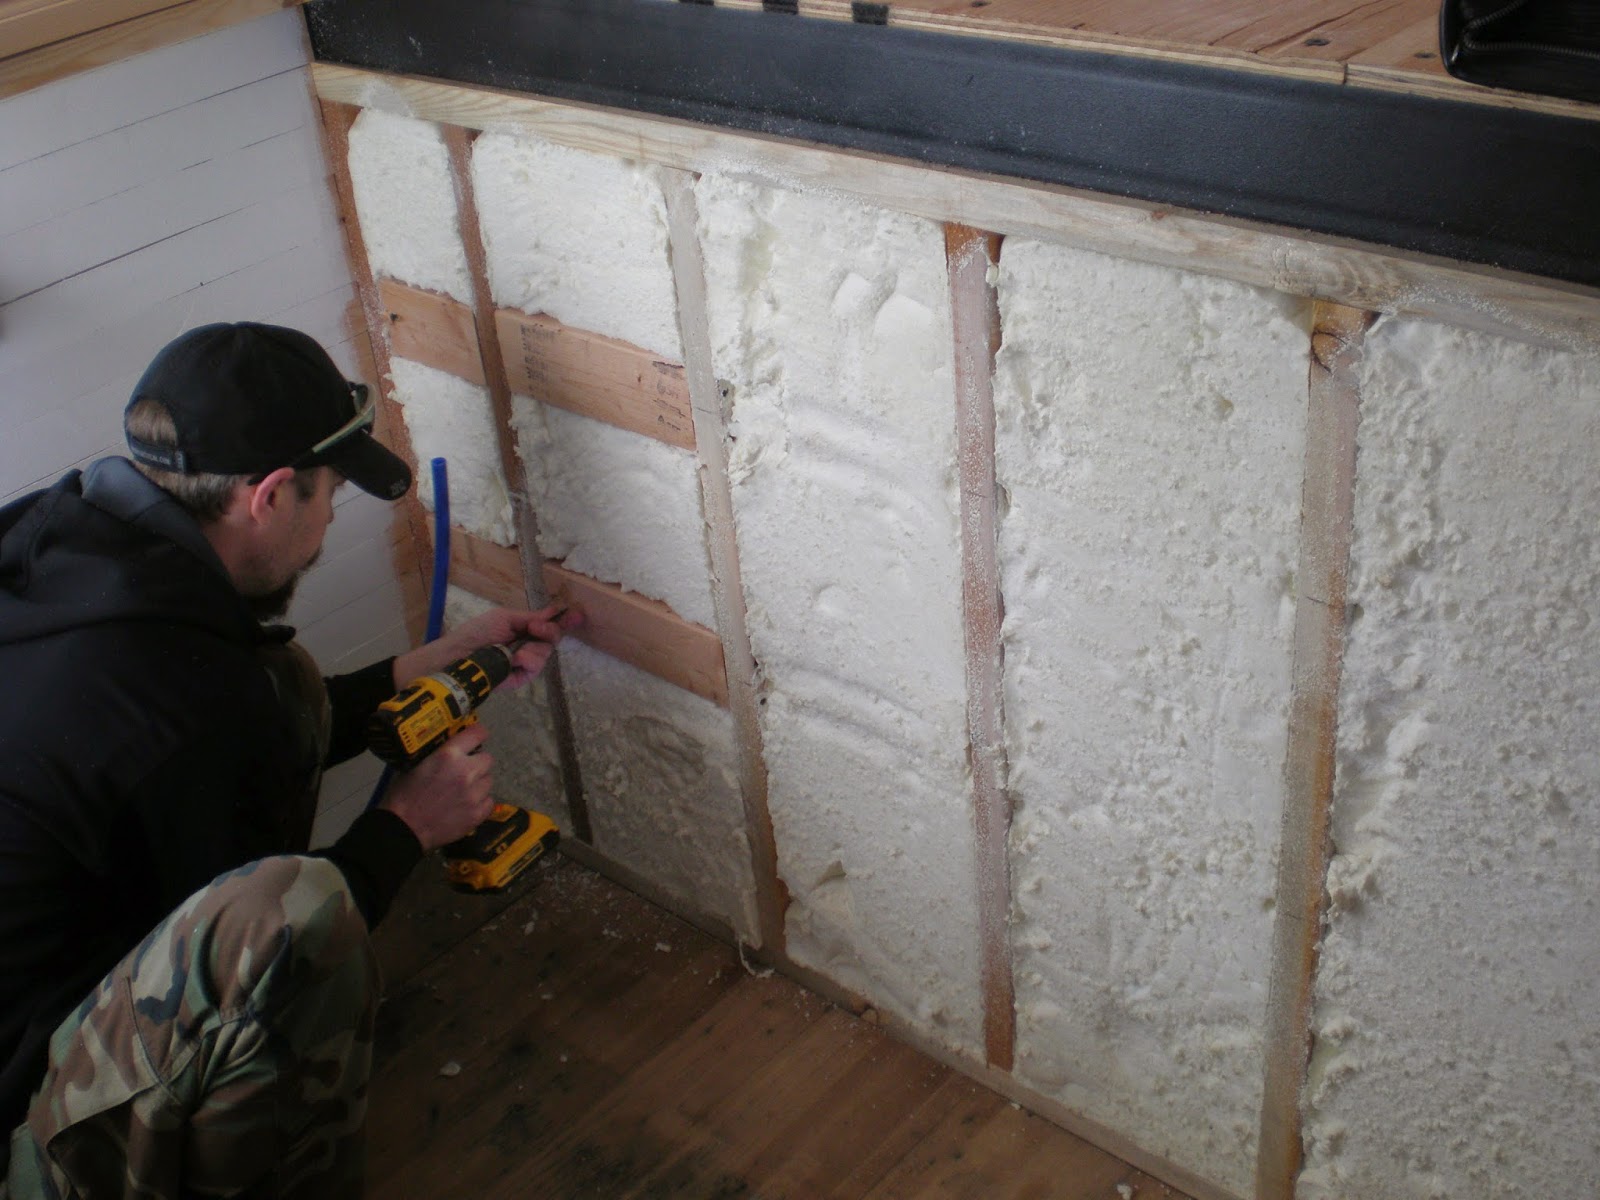
We put some support studs in between the main studs to attach the cabinets and backing to. This is the last little bit of foam insulation that needed to be covered. 


Since this is the back wall of our storage cabinets under the bed, we used scrapes of plywood left from other jobs.


The husband built a handy take apart work table for cutting sheets of plywood and extra work space.  The boards are notched and just fit together.  The whole thing can be screwed to the tops of the saw horses for support as well.  Easy to stack out of the way when not needed.


The bed hangs another 15 inches off the framed area over the gooseneck.  We built storage cabinets underneath the overhang.  One side is shelved for our folded clothing and the other side is a utility area that will house our water tank and filtering system.


We used nice furniture grade boards for the clothing cabinet.  We cut them to size and used wood files to smooth the edges.


We used 2X4 framing lumber for the frame.  We ran them through our planer for a nice finished look.  We filed the rough edges smooth and used our Kreg Jig to drill the screw holes.  We didn't want screws showing or snagging anything.


Assembly underway.  Each section was glued and screwed together for more stability.


We sanded the cabinet with fine grit sandpaper to make it as smooth as possible.


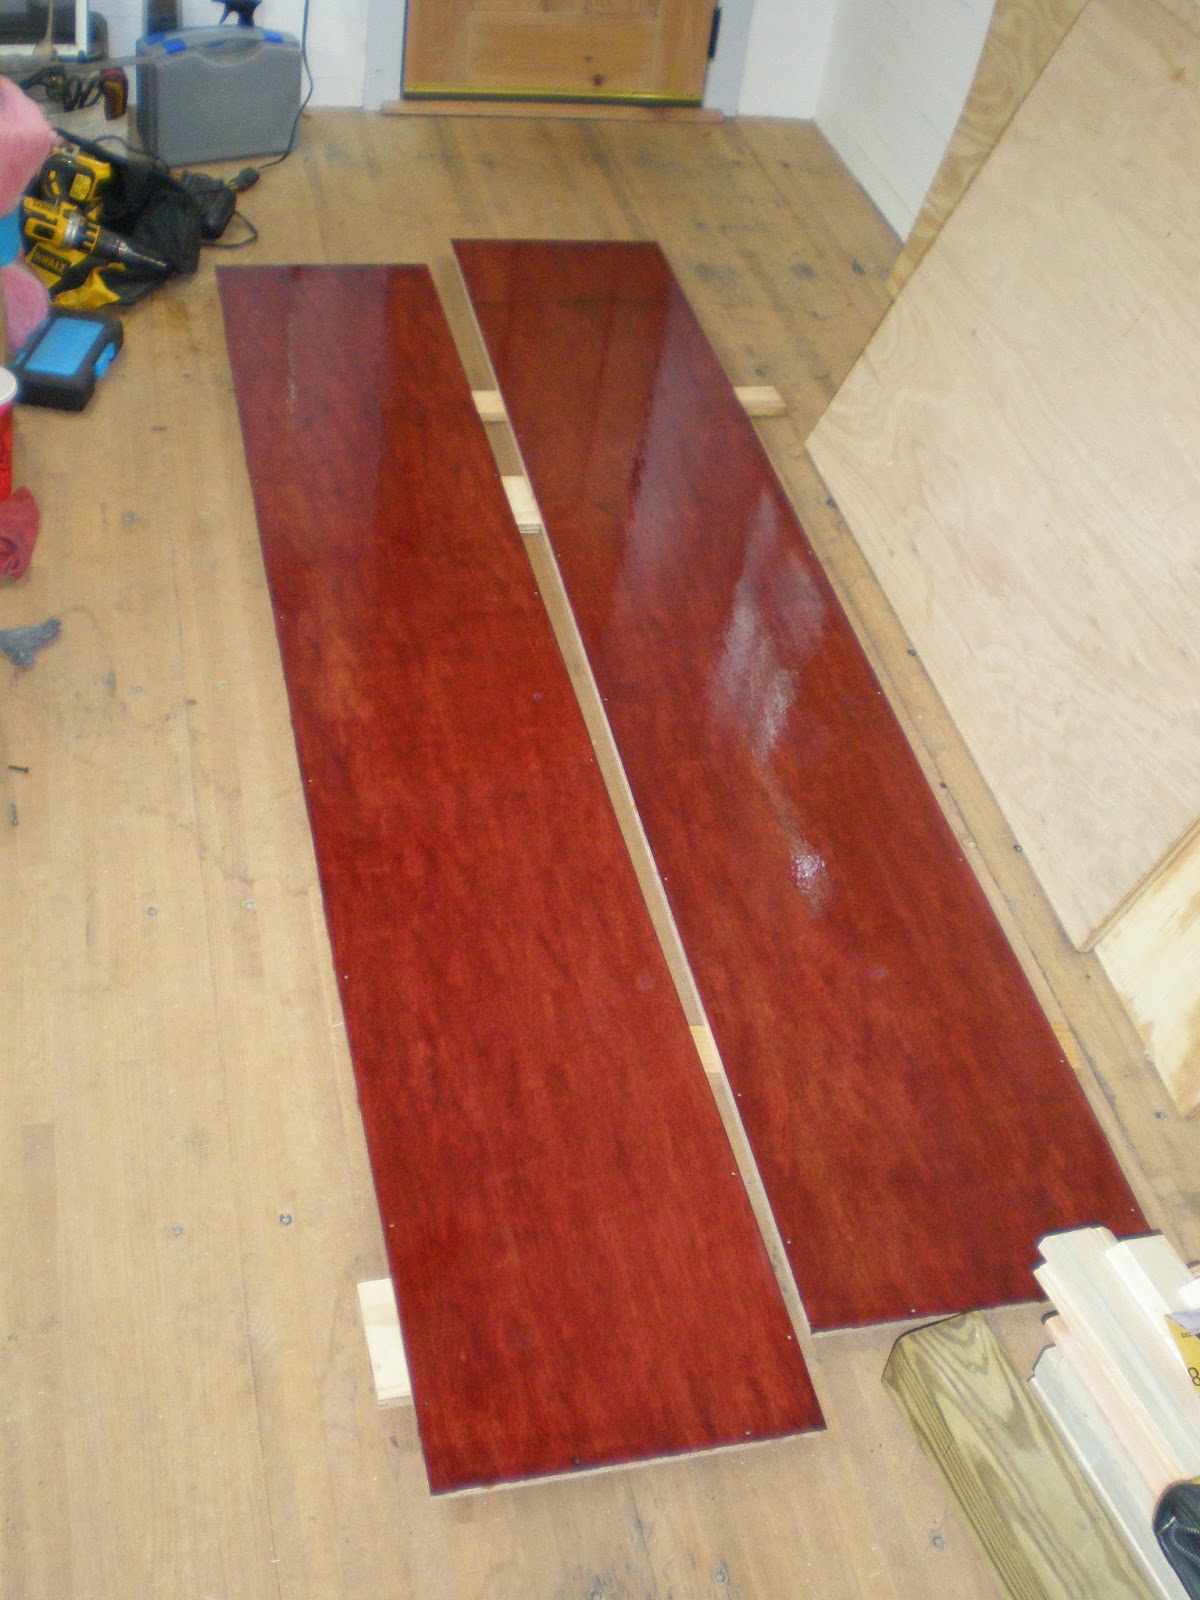
We stained it a dark red color called Cabernet.  This is the color we will be doing the floor of the bed platform and frame in.


We stained the plywood behind the cabinet so it matched on the inside.  We mounted it in place and added the support structure for the utility cabinet next to it.  We cut a channel under the cabinet base to allow the water lines to run to the water tank without being seen. 


We added the last bit of the floor of the bed area.  We used standard plywood as this part would not be seen. 


We used plain 2X4 framing lumber for the bed frame that will hold the mattress in place.  We planed it smooth, cut it to angle in at the top and used the Kreg Jig to drill the hidden screw holes.


The frame glued and screwed together.  We sanded it smooth so we could stain and varnish it.  


We used furniture grade birch plywood to make the floor on the sides of the frame.  We pre-drilled our screw holes so it wouldn't mess up the finished product.  We stained and varnished them to match the cabinet and bed frame. 


Frame in place.  This holds our slat bed base and mattress in place.


If you are not going to use a traditional box springs, I suggest you look into a slat bed base.  This takes the place of box spring and protects your mattress.  It keeps your mattress off the floor so it can breath.  They are curved to give with the weight of the mattress. We got ours at Ikea.  They are cheap and a good investment for a great night's sleep. 
http://www.ikea.com/us/en/catalog/products/30292785/


We cut some base boards out of framing lumber.  The planer came in handy yet again.  We cut them at an angle and finished the ends as well.  We will be painting them to match the rest of the base boards when we get them done. 


We decided to try to save as much of the wood shavings our planer was creating to use in our composting toilet.  Hey, it's a free by-product of making the cabinets! We didn't have a dust collection bag for any of our tools so we decided to make one.  We took a piece of the flexible duct hose and duct taped it to the exit spout of the planer.  We then took a outdoor use garbage bag and taped it to the other end of the duct hose.  We punched holes in the bag here and there to keep it from popping and fired up the planer!  It worked pretty well.  We got a huge bag of shavings saved for our toilet.  :)


We have a bit more to do in this area before it's completely finished.  We will be facing the cabinets with stained wood pieces to cover the edges of the plywood.  We will have doors built for the clothing and utility area.  We are moving on to finishing the floor now.  We wanted to get it stained and sealed before we faced the bedroom cabinets and started on the cabinets for the kitchen area.  We'll be ordering our water tank soon and start getting our filtration equipment in.  So much still to do but it's slowly getting there! 

Thanks for checking out our progress and please let us know what you think!  We love hearing from you.  :)