Monday, May 26, 2014

All The Trimings and Everything!

We got our siding delivered and Ronnie spent the day laying it all out so he could prime the backside before we hang it.  There is a slight gap left for air movement when its hung so this just helps to ensure no water damages it and to help deter bugs from boring into it.


Back side all primed and ready to be hung.


This is pine lap siding also known as #105 pine siding. 


Windows being framed in.  We extended the trim all the way down to the bottom of the trailer to give it a clean look. 


We used our compact table saw to rip standard 2X4s into rough cut trim for the windows.  They came out really nice looking.  Better than the trim we found at the hardware store. 


We borrowed a compound miter saw from my brother in law.  It made such nice neat cuts.  We used it to cut the trim true on the ends and make all the cuts needed. 


I primed all the trim with a good exterior oil based primer we got at Sherman Williams. 


Back of the house trimmed and primed. 


We cut and hung the fascia boards also.  We used 1/2 inch plywood.  We cut a small rail for the underside and then covered the front to completely close it in.


Fascia boards primed and ready on the right side.


Fascia boards primed and ready on the left side. 


We used the scrap leftover strips from where Ronnie ripped the 2X4s down as furring strips. 


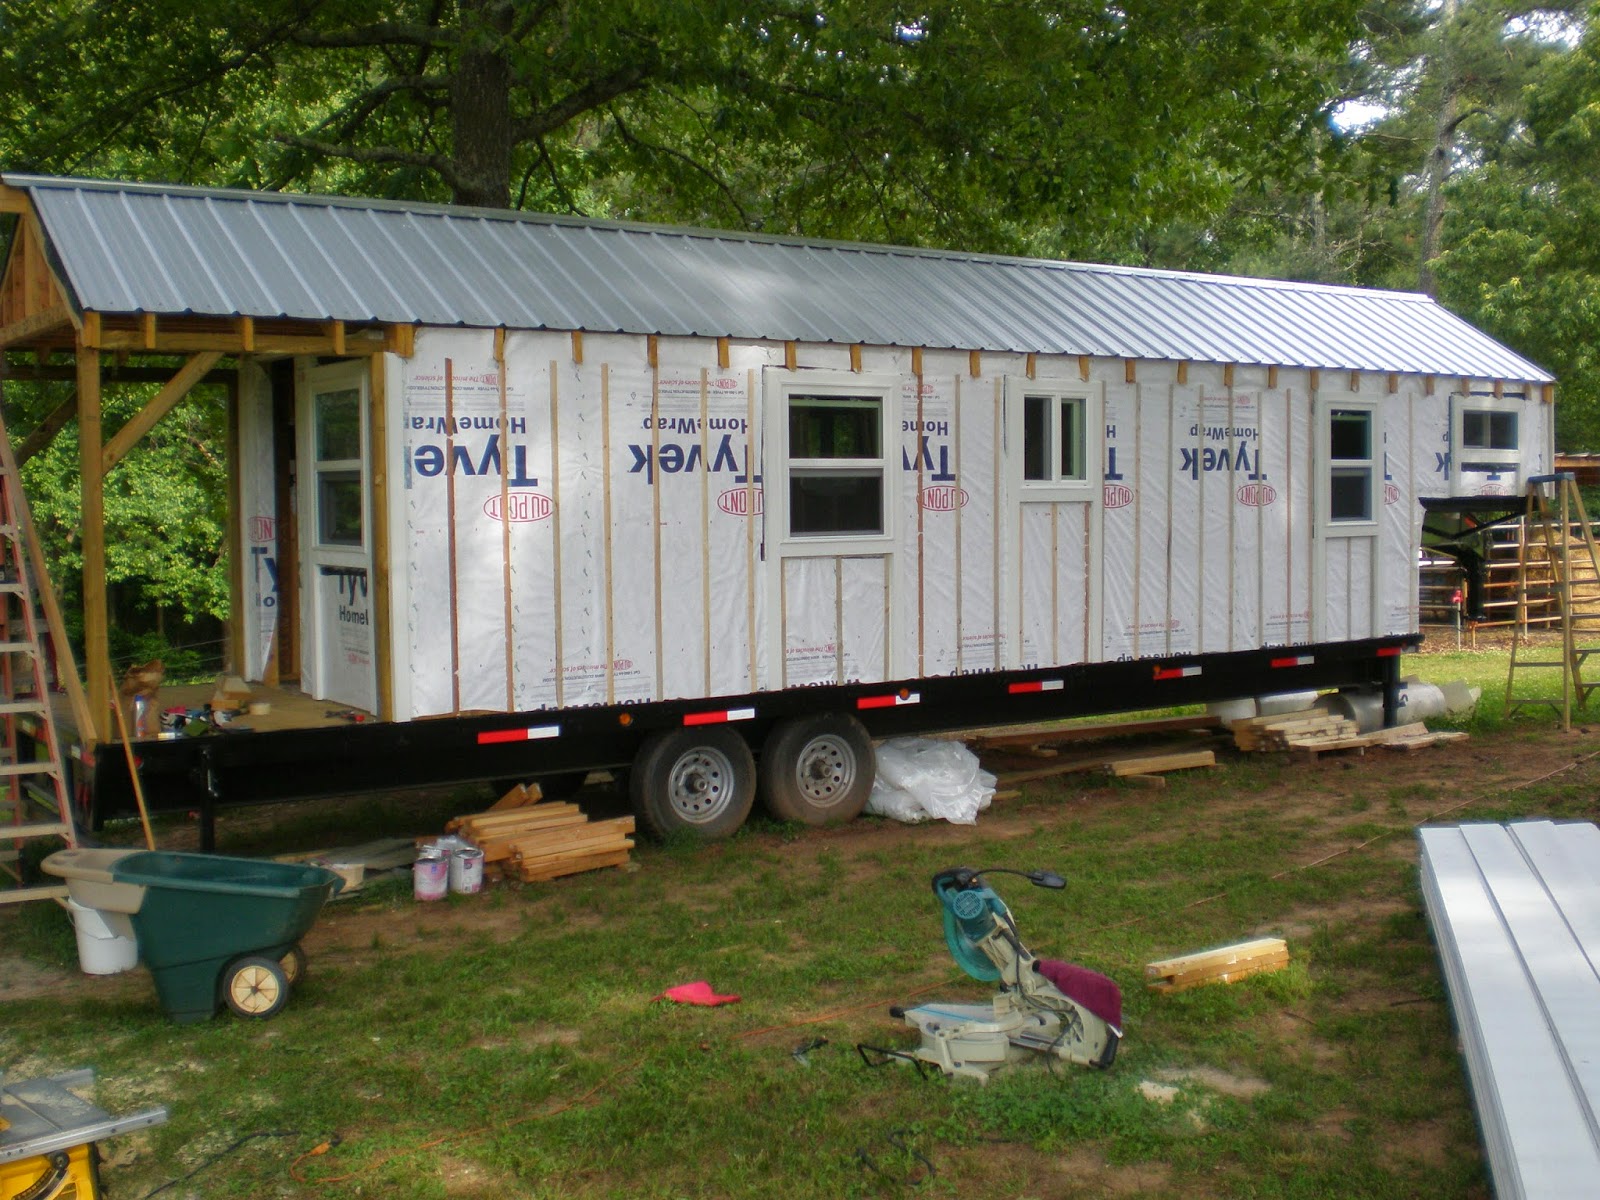
This helps leave a very thin gap between the siding and the outer wall for air flow. 


We were able to add the OSB to the front of the house, over the porch.  We put the house wrap up and have gotten most of the trim pieces ready but didn't have enough time to get them in place and primed.  Next step, finish that up and get ready to side!  :)

Thursday, May 8, 2014

What a View...Through Our Windows!

We spent the past weekend getting the windows in.  It wasn't back breaking work or anything either, which was nice.  The windows just seemed to pop right into place and not need a lot of adjustment to get them level.  We measured the windows really well so when we framed the spots in, they were almost perfect.  That saved us from having to trim out the holes more.  That old rule of thumb, "Measure twice, cut once"  really does pay off! 


Windows in the kitchen and bathroom, both sliders.


Windows in the bedroom area, bath, kitchen and living room. 


Windows in the living room, kitchen and bedroom area.   Opposite side of the trailer. 


Inside view looking towards the front door.  Please excuse the mess and temporary bracing still in place.  :)


 The light the windows let in was lovely and the breeze we got through there felt heavenly. 


 The bed platform windows are also sliders to get a nice cross breeze across the bed.


Lucky came to "help" out again.  He thinks he's the supervisor! 


Some of our neighbors came by to check out how the progress was going.  I think we have their approval so far. 


View out the living room window.


                View out the front window, overlooking the front porch where you can see Ronnie taking a break.


View out one of the kitchen windows. 


We are pleased with the progress so far and how things seem to be moving right along.  Now, we have to decide on the type of siding we want to use and get that going.  SIDING!!  YAY!!! :D

Thanks for staying with us on this journey!  We love having you along!


Friday, May 2, 2014

Dry In...in 3, 2, 1!

We have moved past the main framing phase to the dry in phase!!  YAY!  Finally!  It seems it has taken us forever to get to this stage!  I can actually feel the space now.  I have a doorway I can walk through and window spaces to look out.  The dream takes shape more and more every day we work on it. 


We finally found the T-shaped wall braces we needed. 


We cut a small groove in the studs to insert the TWB brace.


The TWB brace in place and screwed down.


Both braces in place.  This helps true up the walls more and is a recommended part of building a tiny home.  It should help with any shifting you may get when traveling.  Our motto...The More The Better!


Here is a good profile view of what a Simpson TWB Wall Brace looks like.  The folded metal makes the brace stronger.  You cut a small groove into your studs at an angle and insert the folded part into the groove.  Then you screw it down to every stud. 


Now comes the sheathing!!  We used 7/16 inch OSB.  


If you look closely, you can see the TWB in place.


We got all the window spots cut out and ready for windows. 

Break time!  Next comes the Tyvek house wrap.  


We used the Tyvek tape over the staples to seal them up.


 We had the time so we put in the front porch window.  We had a bit of that roof membrane left and since it seals so well, we plan to use it over the screws holding the window in.  Hopefully this will seal in around the window better than just using the Tyvek tape.


Lucky is our constant "helper" and loves to be the center of attention.  He isn't afraid of loud noises or moving equipment so he stays around the project a lot.  :)


We still have to install the rest of the windows and build the front door but the dry in process is almost done!  We plan to install the rest of the windows this weekend.  It should be a nice weekend for working.  We haven't quite decided on the door design yet but hopefully we will have it built soon.