They dream of glorious wood! What could be better?
We fought the rain which we have had a lot of lately. And all the prep work took some time. But first, we framed in the bathroom area.

We framed it to have a storage loft above. This gives us about
8ft of head room. We'll have to start building up the floor for the shower drain soon but that will be explained in a post of it's own.
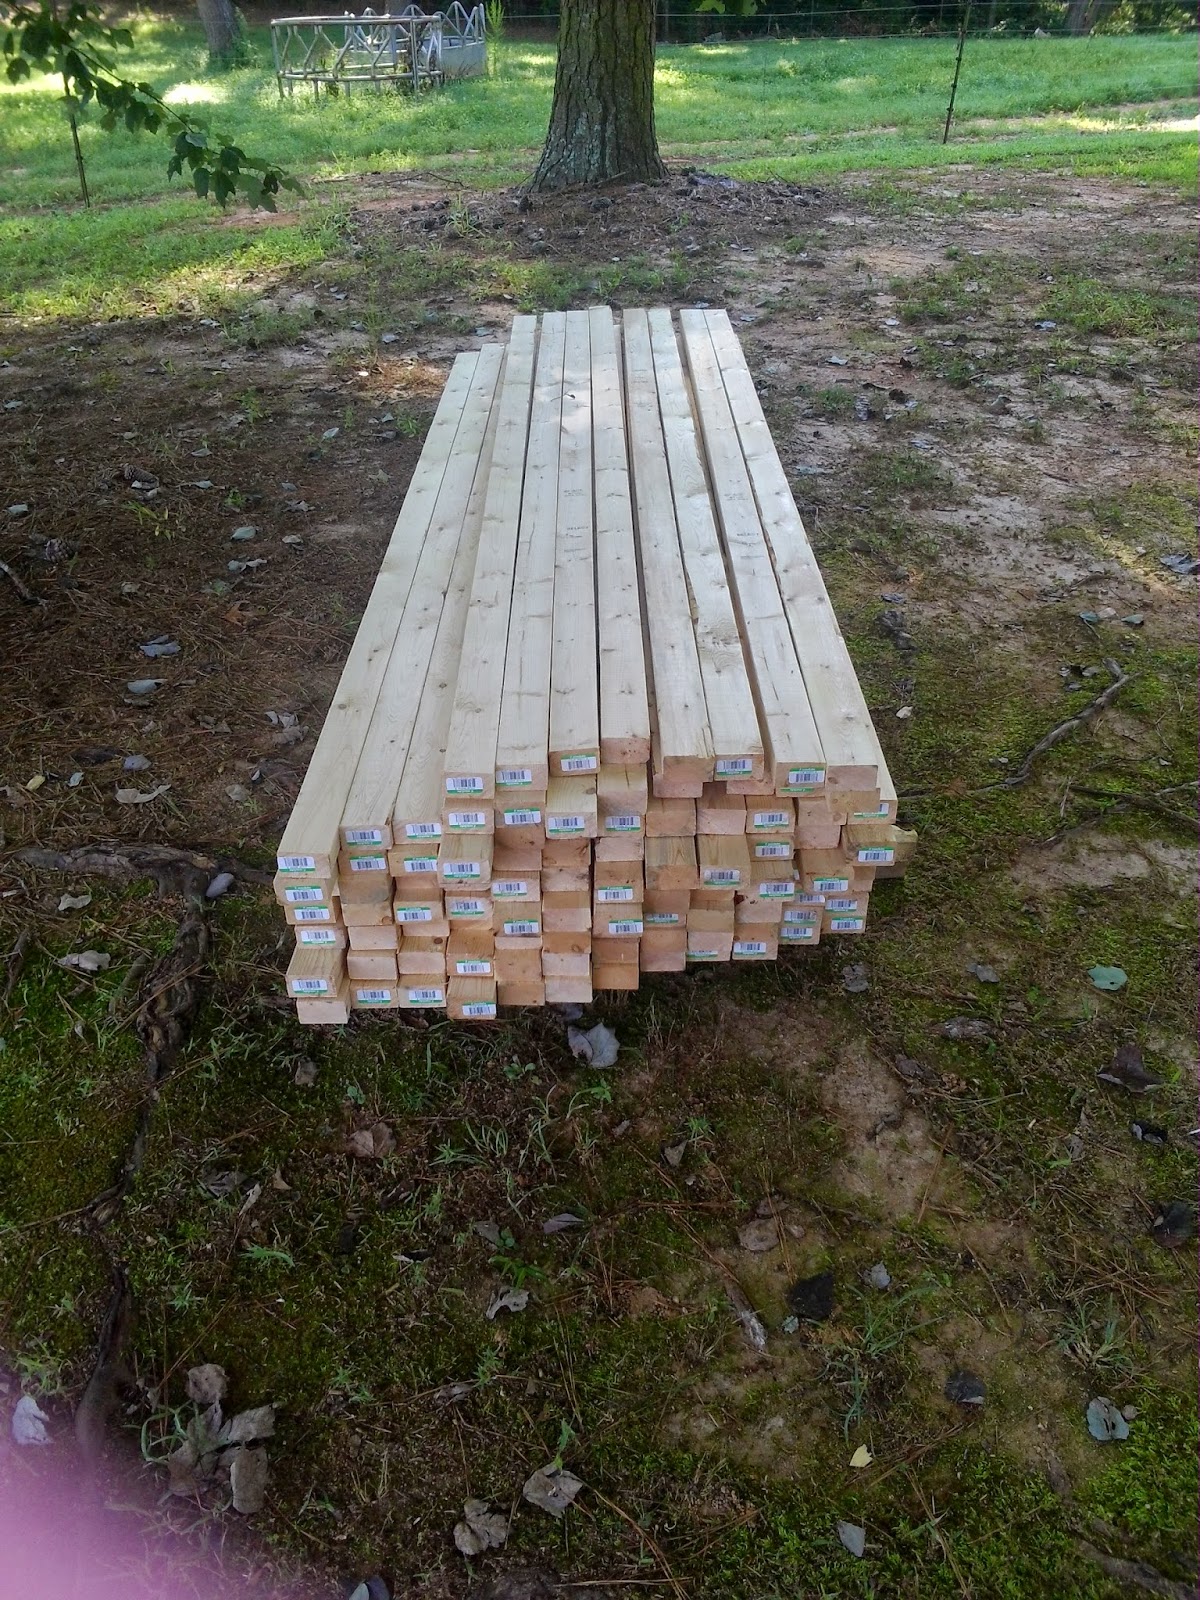
We started with a 100 2X3's or regular framing lumber. We ripped each board down to 4 planks. We priced regular tongue & groove wall covering and it was going to cost us about $2500.00. This cost us less than $400.00 for the wood. We did have to do a lot of prep work but we have the time so it was worth it to us.

We set up a really fancy jig on our table saw to rip the boards.
We bolted a scrap piece of 2X6 to the guide arm and used
2 feather boards we got at Harbor Freight really cheap. At the
end are 2 saw horses we also got at Harbor Freight cheap. They
catch the boards as they come through.

Ronnie running a board through. We would rip about 20, then adjust the feather boards again for the next slice. We keep this up until the 20 boards had been reduced to 80 wall planks and then
start over.

It was a LOT of cutting. And we probably produced enough
sawdust to run our composting toilet for a year! After we
cut all the boards, we had to go back and notch each board on both sides. We used a dado blade setup on the table saw to do this. We got that at Harbor Freight cheap also. Gotta love Harbor Freight for cheap tools!
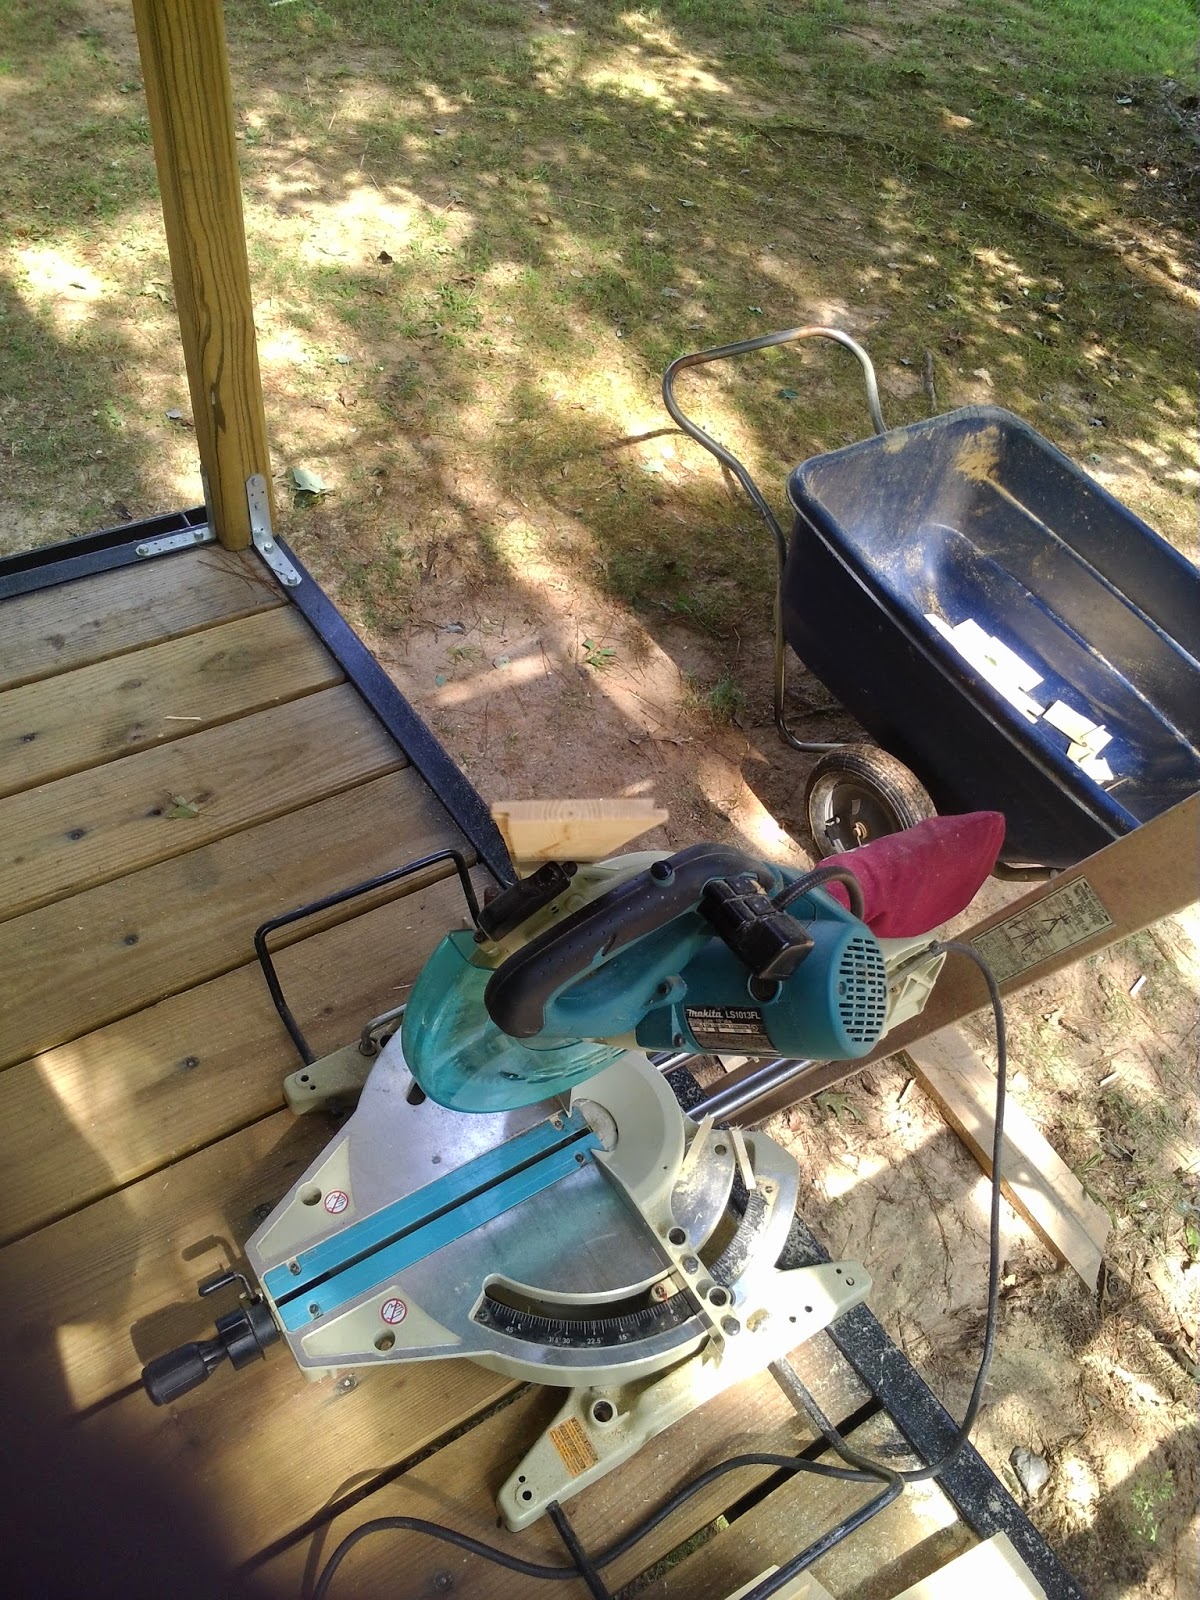
It's a bit hard to see but I leaned a board up so you could see how we notched them. We used the miter saw to cut each board to length as we put them up.

And so, the walls start to get covered. We used a air powered brad nailer to put it up. Since the boards are in 8ft lengths, we could cover a lot with one board.

We tried to stagger the joints so there was a bit of cutting and measuring. We also had to cut around windows and the cross beams.

It's coming together quite nicely. Covering the bathroom outer walls. I cut the boards and Ronnie put them up.

It actually matched up pretty well. We wanted that rough cut rustic look to show a bit. You can see the circular marks where the blade cut through here and there.

We got all this done over the weekend. We were extremely pleased. :)

Ronnie has been at it all this week to try to finish up. He's gotten a lot done by himself.

The ceilings coming together pretty well too. We are not quite done yet. And we may have to get a few more boards and rip them to finish. Hoping that it's only a few.
This has taken us a few weeks to get to this point. We had to deal with a lot of rain. The Sunday we started to notch the boards, it poured. We had just gotten the table saw & jig set up perfectly and notched about 10 boards when the sky just opened up on us! It wasn't supposed to rain at all. Here we are with all this wood laid out on the ground and the saw set up! It was a mad rush to get everything covered and put up! Gotta love Mother Nature! We had a lot or rain that week as well so it was slow going. Ronnie was able to get the boards notched and ready for me when I showed up for the weekend.
We both had colds that we worked through, the Hubby worked better with it than I did! And cutting all those boards Sunday gave me a killer workout. The miter saw was on ground level so I had to squat down and get on a knee to cut each board. Can we say killer squat workout from Hell??
We are pleased with how it has turned out so far. We plan to paint down the road. It will be white to make the space feel bigger and brighter. I'm hoping to enlist the help of one special Uncle that does it for a living. I think I can bribe him down from North Caroline with promise of some really good food and wonderful family companionship. :D Fingers crossed!
I hope you like it as much as we do. Please leave us some comments and tell us what you think? We love hearing from you!
4 comments:
You have a LOT accomplished here. I hear you on the rain -- I was out tent camping and had the same thing happen. No rain in forecast and then the sky just opened. I like the wood color. Maybe you want to rethink the paint thing? LOL (NightShadow)
Chrissy is out for awhile so I can respond to this one. We are currently considering covering the walls with a faux finish that should be a happy medium between bare and painted? The idea is to paint a little at a time, wipe it off while it's wet, then let it dry. After drying we can go over it with a clear top coat. We will be testing this on a few scrap plates first but, we are hoping that this white wash effect will keep the look of the wood and still have color and can be easily cleaned! Bare wood (especially pine) is a pain to upkeep and fades with humidity and sunlight reguardless of how it is sealed or protected......... unfortunatly! Thanks for the comment though.
Ronnie
It's looking so good! Keep up the great work. I can't wait for the next update. I love the approach for making the planks. When I get closer to doing my ceiling I'll review what you did here and see if I can apply it.
Thanks Craig! We spent a lot of time cutting but I think it was well worth it! I'm in LOVE with how the walls came out. If you have any further questions, please ask or drop me an email and I'll make sure Ronnie answers you. He spent a lot of time getting this method down to a science! I am looking forward to seeing how your place turns out as well! I just love what you have done so far! :)
Post a Comment