Thursday, April 30, 2015

Kitchen Cabinets - Part 2!

We have been working towards finishing the kitchen cabinets up.  We began to build our small cabinet that fits between the stove and the refrigerator.  Most of the time we've been fighting Mother Nature.  It has been extremely rainy here for most of the month.  It really restricts our building as we have to cut everything outside.  But we have been managing.


Since the space on this side was tight and we needed to make sure the appliances would have enough room, we taped the exact measurements off along the wall and the floor before we started to build the cabinet.  It would have been awful if we couldn't get the fridge in the spot designated for it and had to rip out the cabinet after it was built!


The dividing walls being put in place.  We used a lot of left over 3/4 inch plywood on this one because the sides would be covered by the appliances and not seen.


Starting to look like a kitchen cabinet.  Again, scrape leftovers being used as you can see by the slightly stained boards.  :)


Facing the front of the cabinet.  We used framing lumber that we ripped to the correct thickness and glued it together.


Building the drawers.  We had to cut a groove to accept the plywood bottom.  Everything will be glued and screwed together to make the drawers strong.


Two down, one more to go! I wanted deep drawers for maximum space.  All are 16 inches wide by 23 inches long overall. The small drawer is 5 inches deep and the other two are 8 inches deep.


Drawers installed, minus the facing.  We splurged and bought the nice soft close hardware for the drawers.  They have a plunger system inside that you can adjust to glide close, even if you slam them.  I love them!


We tiled the top, just like the other cabinet.  I really love the clean look of white tile counter tops.  We got the cabinet painted.  You can see screw holes on the side but since the fridge will be against the cabinet, we didn't worry about plugging them.


Nice closeup of the tile :)


The drawers and door on the small cabinet.  The doors are 3 panel shaker style to match all the other doors in the house. 


Everything is working properly.


We used soft close hinges on the doors as well.  They had to be recessed into the door.  We used a 1 3/8 inch forstner drill bit to drill out the holes.


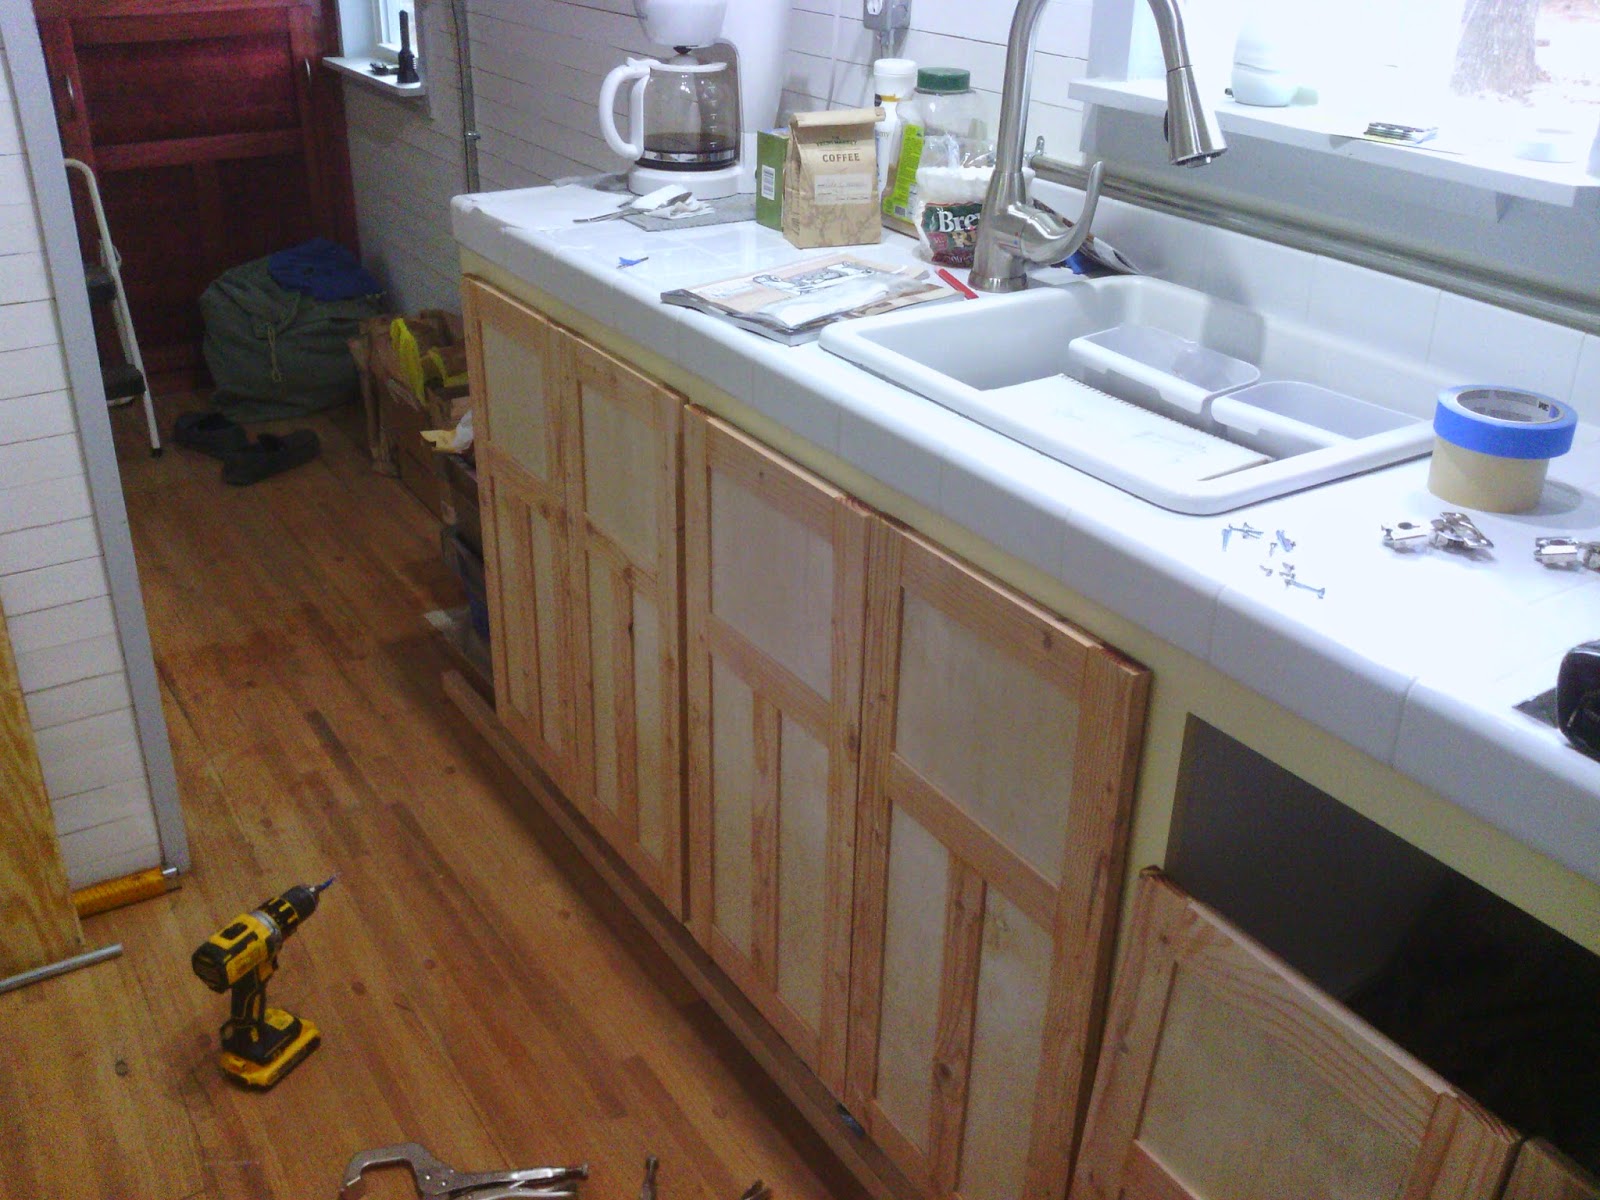
Mounting the sink cabinet doors.


Now, it's time to paint!  Well, have to tape off all the doors first since they are two-tone.  That, in itself is a pain in the you-know-what.  I spent the money on the good blue painters tape.  Took extra care to make sure the tape was properly put down.  I'll admit up front, I am a terrible painter so I was really trying to avoid one color bleeding onto the other!  But, all that time consuming precautions still didn't prevent bleed over!  And I blame the tape!  Since it was all along the edges.  So, micro touch-ups had to be done by the Hubby, since as I said, I am a terrible painter!  The paint does deserve some mention.  I used Behr Premium Plus - paint & primer in one.  It's low odor, which was very nice since we painted inside.  The paint & primer in one gave a nice coverage even after the first coat.  It sealed up a lot of the imperfections in the wood nicely. 

We wanted to use something creative for the handles on the doors and drawers.  We bought some cheap stainless spoons at the dollar store.  You got 4 for a $1.00...not bad!


We drilled out screw holes and bent the spoons into shape. 


That's how our spoon door handles turned out!  I love them!


Sink cabinet doors painted, mounted and with handles! 


We got our fridge put in place.  Fit perfectly!  Measuring several times before building is a must! 


Drawers with facing and hardware mounted.  I am loving my kitchen!


There you have it!  Cabinets are done!  I am very happy with how they turned out!


We are getting ready to move on to setting up the water system.  We are ordering our tank, filters and pumps now.  Once we have everything, we can get started!  Excited to get water running.  :)

Thanks for stopping by and checking out our progress!  If you have questions or just like the build, leave us some comments!  You know we love them! 


Friday, April 3, 2015

What To Doo About Our Loo

The time has come to build our loo.  We have put it off because it wasn't really needed before.  We had been staying in the guest quarters with it's own bathroom right there.  But now that we are spending the night in Tiny when we work on her, it's time we need one.  Waking up in the middle of the night and having to trek up to the main house when you need to use the bathroom stinks!  Especially since it always seems to be me that has to go!  There's nothing funnier than watching someone in their pj's doing the pee-pee dance/walk across the yard in the moonlight!  So, I demanded the loo be made as soon as possible.  And, voila!  Hubby did not disappoint!


Originally, our plan was to buy a commercial toilet. But as we saw how small the room was going to be (less than 16 sq. ft)  we started looking at other options. Commercial composting toilets are pretty large to say the least. They usually sit higher and you almost need a stool to step up on whilst "doing the doo"!  Another thing we didn't like was the look of the toilets. They barely look like a toilet in a house and more like something from a space shuttle! The cost of them can be shocking also. I think the unit we were considering was around $900! So, we decided to build our own! 


We decided to go with a basic loo based off the "Loveable Loo" design.  We figured start easy and if it didn't work for us, we could go another route.  The concept behind the "Loveable Loo" is that everything goes into one bucket, instead of a separator for liquids and solids.  You put down a layer of media of sawdust, cedar chips, peat moss, or whatever you wish to use, do your business then cover with another layer of media and voila, you are done.  Being that what you use for media, your waste and toilet paper are all biodegradable, you can compost it to use as fertilizer or just compost it to put it back into the earth.  I know many in the tiny community use this same concept and report that it works well. 


The first thing the hubby did was draw up a plan.  We didn't want just some square box to house our loo.  We wanted something that looked nice too.  And since the area is kinda small, we thought a octagonal shape would work better.


We decided we wanted to stain our loo the same color we stained the sink shelf.  We used edge-glued shelf grade boards to make the loo.  It's the same wood we used to make the sink shelf.  We got all of our measurements and cut our boards to the proper length.


Once all the lengths were cut we had to rip the pieces on 22.5 degree angles so they would form the shape of the loo.


After all the cutting, we figured out which sides would be the bottom on the panels and marked them. Then, marked a line on the inside-bottom about 2" from the sides of all panels. This is for drilling a pocket hole so the base can be fastened to the bottom panel of the toilet.  We screwed the panels down to a scrap piece of plywood. And, using a framing square we made sure that the panels were going down true.


We cut an alignment guide out of a piece of scrap. This was so we could hold the panels together at the tops while drilling the pegs. We even drilled pocket holes in it to fasten it to the base. Once we had 2 panels together we drilled a 1/4" hole just on the edge in 2 places. This put the hole through one panel and into the adjoining panel about an inch deep.


After that we took the alignment jig off and ran masking tape on both sides of the glue joint to keep the wood clean. To apply the glue we took one of the panels off the plywood base. After applying the glue we replaced the panel and filled the holes with 1/4" dowels. With the joint was held firmly together we wiped the glue off, cut the dowels off, removed the tape, put the screws back in, and moved onto the next glue joint. We moved around the base and did one joint at a time being careful not to screw up the doweling direction.


 There she is, all glued together and ready for the base.


We set the bucket where it needed to be and marked around the bucket and the little center circle. With a Dremel tool and a 1/4" mill bit we cut the circles about 1/8" deep. This was to keep the bucket from moving around inside the box.


Fits perfectly!


We cut the base to the right dimensions and screwed it onto the box.


We bought some felt padded feet to go on the bottom.  They can be adjusted to make the loo level since our floor is river rock.  We got them marked in place and mounted.


We wanted the top to sit down inside the box a little to keep it from moving around.  We marked the dimensions then chiseled a lip out all the way around the loo.


We then marked the loo's hole in the top and cut it out. We also rounded the edges on top over a bit.


We mounted some flush hinges to the lid of the box.


W mounted the toilet seat.  We also made some L shaped metal brackets to act as a seat stop.  They keep the seat from falling back and banging into the wall.  


Voila!  Now we are ready for stain and varnish! 


We stained the loo the same green we used on the shelf under the sink. 


Looking good so far!


We added some decorative clasps on the sides to keep the lid closed.


 Hubby checking out the finished project.  He approves!  


Fits perfectly in the little space we had for the toilet.  Plenty of elbow room and all to do your business!  


So there you have it...our loo!  We are really happy with how it turned out.  We will be trying different medias to see which works best for stopping odors.  Our first will be to try the sawdust we have been collecting since it's free.  The local feed store sells shavings and such for stalls so we may go look at what they have.  I'll be sure to give a rundown on how the media works once we have been using it for a while.  :)


Wednesday, April 1, 2015

Bathroom Door And A Linen Closet All Rolled Into One!

With space at a premium in our small bathroom, I noticed that I wasn't going to have space to store clean towels and other odds and ends we don't use daily.  The shelves under the sink will hold our normal daily use stuff so it's on hand.  But where do I store towels, new bottles of shampoo and soap, medicine and other various stuff that you expect to find in a bathroom?  When I brought the subject up to my wonderful husband, I just knew he'd find a solution.  And boy, did he!  A door with a linen closet built on it.  One that wouldn't take up much more room than the width of the door jamb.  And the door for the linen closet could be a full length mirror???  Genius! 


Hubby got the graph paper out and got to work figuring out all the little details and design of the door.  We bought a cheap frame-less full length mirror from Target for about $15.00.  It was metal but had a clear look like glass.  This door was built using cheap framing lumber and plywood.  The door will be painted so no need to buy expensive hardwoods like we did for staining purposes.  


Hubby ran planed down 2x6s and 2x4s (no specific dimensions) on a table saw with a dado blade set to 1/2".  The frame itself is just 2 horizontals tongue and grooved between 2 vertical rails. If you look at the picture the groove in the edge is offset............. that is purposely done to give more hollow space for use in the closet! That extra 3/4" for us was the difference between staying within the door jam or bulging into the bathroom! 

 We designed the closet opening to be roughly the dimensions of a door mirror (48" x 12") . Hubby ripped down some scrap 2x4s and used a planer to make 1/2"x3" stock. Using the stock cuts he cut the shelf boards the full 3 inch width so they could rest inside the frame of the door. Next, he ripped some of the 3" stock down to 2 3/8" for the closet boards that will rest on top of the frame. No fancy joinery is needed for this because a pocket hole jig is used to hold everything together.  The very bottom horizontal board had to be notched so it can rest inside the frame and the ends cover the bottom of the 2 verticals. We got it glued and screwed together. 


We decided to add some rails as hold backs in the closet. Hubby drilled 1/4" holes in the vertical boards to hold 1/4" dowels.

We bought a standard interior door knob with a twist lock.  We got it mounted per instructions.  


We attached the hinges for the door and for the cabinet door also.  We recessed them into the door so they were flush.  Chisels are fun.  Now on to build the cabinet door out of the mirror!


Hubby built the frame so the mirror could be recessed flush with the frame.  


 He used a ladder frame design and epoxied the mirror to it. He used generic JB Weld from Harbor Freight. (The stuff works and its cheap) The good epoxies usually take all day to harden so we used soft clamps and let it set for a while.


We then marked where the hinges would sit, chiseled out the areas and attached them.


Viola!  Cabinet door attached! 


Chiseled out the area for the door hinges to attach.  


Outside of door with the frame built around it.  


 The cabinet clears the door frame even when the door is open so nothing hits.  Which is nice in case someone is getting something out of the cabinet and the other person tries to open the bathroom door!


Inside section of the door.  We attached some slide catches at the top and bottom of the cabinet door to keep it closed.   The cabinet sits just a hair outside of the door jamb so no space is lost inside the bathroom.  I think it turned out perfect!  Paint to come soon!