Thursday, June 18, 2015

Water Hook-Up - Part 1...We have Running Water!!

We are so excited to get this part done!  I probably say that about all of the steps along the way but having running water is such a wonderful thing!  We have been getting by with a pitcher of cold water in the fridge for drinking and a 7 gallon jug on the porch for anything else.  It's been okay but filling and carrying that jug is a pain.

First thing we had to do was order our water storage tank.  We looked at some of the cheaper water tanks online but none fit our specs.  Most people buy their tank and build a space around it.  We had a specific space in mind and needed a tank that would fit our dimensions, so we ordered a custom tank.  It was a bit more expensive but was worth it for us.  We ordered our tank from Plastic-Mart.  They were really helpful and also custom fit our inlet and outlet water holes where we wanted them.   http://www.plastic-mart.com/category/33/rv-water-tanks


We then had to get some water filters, a pump with strainer and accumulator.  The filters we bought at Home Depot.  The other stuff we ordered on Amazon.  Here's some links to the specific items so you can check out the specs and prices. 

Pump = http://www.amazon.com/gp/product/B00E5UVXJ8/ref=ox_sc_sfl_title_3?ie=UTF8&psc=1&smid=A2PM1IS2Z68BF4

Strainer = http://www.amazon.com/gp/product/B000V2W0GE/ref=ox_sc_sfl_title_2?ie=UTF8&psc=1&smid=ATVPDKIKX0DER

Accumulator = http://www.amazon.com/gp/product/B000N9VF6Q/ref=ox_sc_sfl_title_1?ie=UTF8&psc=1&smid=ATVPDKIKX0DER


We wanted to have the option to use our storage tank OR hook up to a pressurized water line or hose.  This meant we had to have a way to shut off the tank and pump system and bypass it completely.  The hubby drew up a schematic of how he wanted the system to work.  This kept us from missing any steps when we were installing the system.    


The top drawing is our drinking water system.  The bottom drawing is our shower system.  It will be a closed loop system that recycles 10 gallons of water for showers.  We'll be working on that pretty soon!


Now, on to installation! :D


We supported the tank on a piece of 3/4 inch plywood.  Once we had it in place, we started figuring out where the filters would mount, as well as the pump and accumulator. 


We strapped our tank in place.  We used some left over roofing metal and a piece or heavy rubber mat under it to protect the tank.  We built a small shelf to mount the pump to.


 We ran our fill line into the tank at the top.  This line goes outside to a garden hose hook up.  There is a shut off valve right above the fill hole to bypass the tank and one on the line above to open the pressurized line hook up.


The line running through the floor is a drain line.  This is in case we need to drain the tank.  It runs under the trailer and is fitted with a cap that can be removed when draining the tank.  The line not connected is our main water line.  Both have shut off valves for maintenance and draining. 


We mounted the pump and accumulator in place, ran the main water line from the tank into the strainer, then into the pump.  From the pump it goes into the accumulator. From the accumulator it goes to the filter.  There is a shut off valve so you can bypass this stage when hooked up to a pressurized hose.  This allows the pressurized hose to connect straight to the filter.  Getting confusing yet???


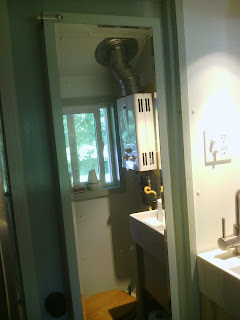
The water line leaves the filter and connects with our sink water lines.  This system runs both the bathroom sink and the kitchen sink.  It's one line from this point into the water heaters.  Once it branches off from there, it becomes a hot and a cold line to each sink. 

The drinking water filter is a 5 micron carbon filter.


We also have a second fill hole with a cap on it.  We took a standard cap and drilled some holes in it to allow air to escape the tank.  We can remove this cap and fill the tank with a jug if needed. 


And there you have it.  Our drinking water system is running!  Albeit, cold water only as we don't have our propane system hooked up just yet. 


Bathroom sink running!! 


Kitchen sink running!! 


It seems confusing but it's really not.  A good drawn diagram will help you set everything up.  That way you can visualize where each line needs to go.  You can then decide what kind of fittings you will need for each step.  This really cuts down on trips to the hardware store for another fitting or two later in the day!  We hope this was helpful to anyone trying to figure out how to hook up their water system.  Thanks for reading and let us know what you think!  :)


Friday, June 12, 2015

Our Lovely Screen Door!

I love screen doors.  Not storm doors with a small screened area you can open, but an actual screen door.  I love being able to leave the main door open in the evenings and hear nature through a screen door.  There's something soothing about it.  I've always loved the old fashioned wood screen doors.  So, when I think of my living space in my tiny house, I couldn't imagine not sitting on my couch, listening to the birds and crickets through my own screen door! 

I've noticed a lot of tiny houses don't even bother with screen doors.  I don't know why.  It helps make the space seem even bigger and more open.  And they really are not that hard to make.  All you need is some scrap lumber, wood glue, a few tools and a roll of screen!


We ripped down some plain 2X4's to the desired thickness.  We used our Kreg's Jig to drill some screw holes.  We could have just glued it together with good wood glue but since we have that handy tool, we use it as much as we can.  We cut the bottom center support board down the middle, clamped it together and cut out a small tree shape with our jig saw.  A lot of the old fashioned doors had this design. 


We glued all the pieces together, sank a few screws in the appropriate areas, and clamped it together to dry.  We plugged the screw holes with a dowel rod, glued them in place and cut them flush.  After the door had set overnight to let the glue dry, we sanded it.


We found a screen door hardware kit that came with the hinges and handles.  The hinges are spring tension so they return the door to the closed position when you let go of it.  The handle is a fixed one, without a catch.  We'll be using a hook & eye latch on the inside to keep it closed when we are home.  Mainly, to keep our cat from pushing it open and getting out whenever he wants. 


We cut some small thin strips of wood from scrapes and nailed it on the inside of the frame.  This is to hold and cover the edge of the screen.  Kind of like a trim piece.  Kind of hard to see in this picture.  We will do the same on the other side once the screen is in place.  We used the same stain on this as we used on the main door. 


My husband found a picture of a really cool door with a wire spider's web in the corner.  He asked if I would like something like that..as if he even had to ask!!  He found some old scrape barb wire on the property and got some steel baling wire to connect it with.  The barb wire was a bit tough to bend into shape.  I think it turned out awesome! 


We used metal screen in our door so or cat won't be able to claw it up. Not that he's ever done it before but just in case. It wasn't that much more in cost than the vinyl stuff but was a bit harder to stretch tight in the frame.  


We covered the backside edges of screen with some more thin strips of wood.  This gave it a nice clean look and covered up shard edges.  We added our hook & eye latch (upper left corner of pic).  We also put a strip of rolled foam against the door jam inside so when the door slams shut, it wouldn't be wood against wood. 


Door finished!  I just love it so much! 


Close up of the barb wire spider's web. We used some old barb wire staples to hold it in place.


A view from the inside.  Can't wait to get some bird feeders in that tree out front


We are very happy with how the door turned out and how well it works.  It's nice to be able to leave it open at night and listen to the crickets.  We also have a pond in the woods and you can hear the bullfrogs croaking all night.  Sounds of nature are so soothing to me.  Speaking of nature..while we were working, we had a visitor!  


We woke up to find this Eastern Grey Tree Frog perched on the top of our ladder.  There was a bit of standing water from the rain and he was just soaking it up!  He stayed there most of the morning with us going up and down the ladder.  Never paid much attention to us. 


About lunchtime he migrated up onto the porch and perched on top of my broom.  He stayed there for a few hours before moving to a nearby tree.  I hope to see him around a bit..I love frogs and toads.  :)

 Thanks for reading and please let us know what you think.  We love hearing from our followers!  :)


Friday, June 5, 2015

Paint, Paint and More Paint!

Have I ever mentioned how much I hate painting??  No?  Well, I do!  I'm not very good at it either, unless it's all one color and I don't have to worry about staying inside the lines! 

We have had some really rainy days lately, making it hard to do anything outdoors.  Which halts a lot of our build since we have to set the saw up outside.  So, we painted some things that needed it. 


We originally painted all the window trim in the grey we used for the support beams.  After painting the cabinets, it didn't match up well.


We painted them in the same colors we used on the cabinets, and they look much better.  I really love that creamy yellow!


The hallway trim was also grey.


We repainted it with the green color we used on the cabinet trim.


We painted the bathroom door.  The outside colors match the kitchen.


The inside color matches the bathroom trim color.  


Our multicolored door.  :)


Inside of the linen cabinet painted.  As you can see, it holds shampoos and other such stuff pretty well!  :)


Sorry the lighting wasn't the best but you can see, it matches the inside of the bathroom.  


We got the wood counter-top sanded and varnished.  We cut the holes for the plumbing and gas line going to the water heater.  This will give me a little bit more counter space.  The space below it is where our cat's litter box will go.  I'm thinking we'll have a curtain across the front to hide it.  Time to start looking for some old printed burlap sacks or something similar!


We are working on the screen door now.  We are making it ourselves, just like everything else.  Fighting the rain right now.  Pop up thunderstorms are frequent right now.  The ground is saturated.  It's bringing out all sorts of creatures.


We noticed this little guy first thing in the morning.  He's just chilling in a little bit of standing water.  What a great climber, to get on top of our ladder!  He's an Eastern Grey Tree Frog.


Several hours later and he's migrated over to my broom.  He eventually made his way off the porch and over to the tree in front of the tiny house.  Hopefully, he's content there. :)